Trading System
Trade System
By: Aizui
Table of Contents
1. What’s a Trade?
2. Tradable Items
3. Trading Process
4. Status of a Trade
Section #1 ---- What’s a Trade?
A trade is an exchange of something from one person to another for something he or she has and visa versa. Trades are usually used to get different items that the other person (or in this case member) does not have. However this is not always the case, trades can consist of any reasoning as long as both people agree upon the exchange or otherwise known as trade!
NOTE: Trade is different from Transfer. Transfer implies that one member wishes to send an item to another member. In other words Transfer is more like giving.
Section #2 ---- Tradable Items
1. Items (all items in Furvilla)
2. Villagers
3. Currency (Furdollars and FurCoins)
NOTE: Trades can consist of mixture of items, villagers and currency in one transaction. It can also have only one of the available sections for trade. For example: Items.
Section #3 ---- Trading Process
NOTE: This trading process explains on how to add everything that can be possibly added to a trade. Not every section has to be filled out depending on the trade. Steps 1 - 6 must be provided in every trade regardless.
1. To start of with a trade locate the Town Hall button below. This is located in the main menu at the top of the screen. Then click on it to navigate to the next step.

2. A town map of current village should appear. Scroll down once it is in view until a menu is displayed. The menu will consist of Shops, Community, and Commerce. In the Commerce section locate the following button. Then click on it to navigate to the next step.

The webpage should look like something similar to what is shown below.
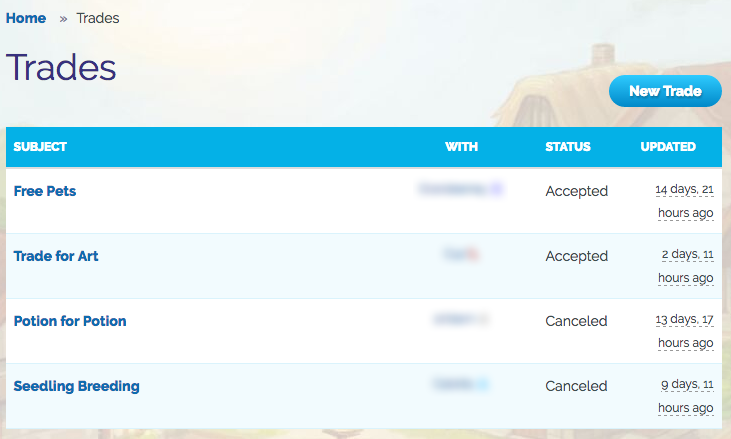
3. To start a new trade click on the New Trade button provided. It is located at the bottom under the list of Trades.

The webpage should look like something similar to what is shown below.
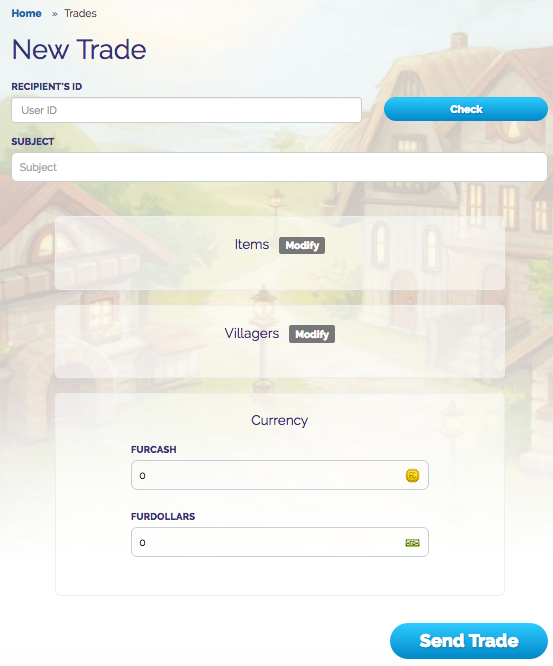
4. Go to the first section labeled Recipient's ID. Type in the Recipient’s Identification Number (ID).

NOTE: To locate a Recipient’s ID click on the name of the Furvilla member you wish to send. A profile of the member should appear. The webpage should look like something similar to what is shown below.

At the top locate the User ID. highlight and copy the number provided. Do not copy the # symbol.
At the top locate the User ID. highlight and copy the number provided. Do not copy the # symbol.
5. Check the number that was typed in the previous step by clicking on the Check button provided. If entered in correctly it should appear similar to what is shown below.

6. Move down to the next section provided. It should be labeled as Subject. Enter in the general terms of the trade. (This is a suggestion for accessing the trade later down the road for information and backtracking.) Anything can be entered in this field. The webpage should look like something similar to what is shown below.

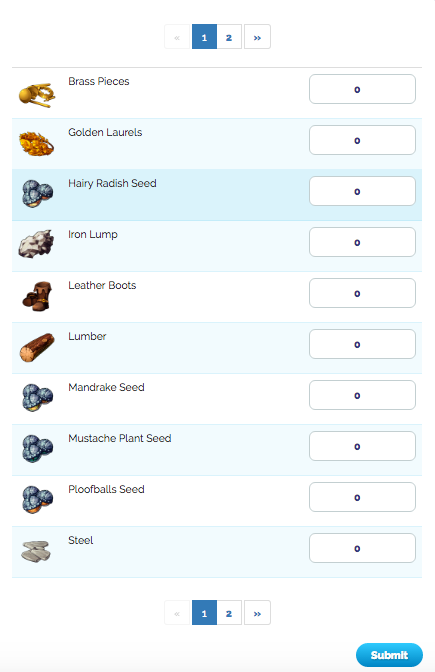
7. Move down to the next section provided. It should be labeled as Items. Click on the button next to the title stating Modify. A navigation menu should appear listing all the items currently in Inventory. The webpage should look like something similar to what is shown below.
NOTE: If items are not in Inventory they will not appear in the menu mentioned above.
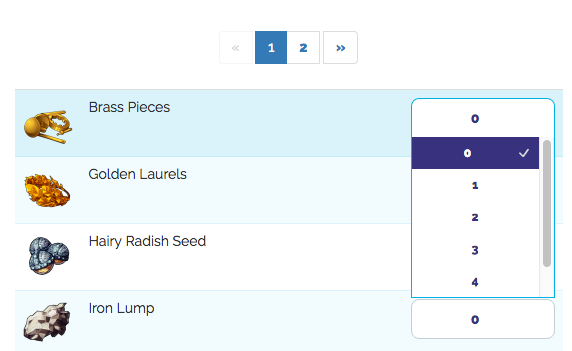
8. Click on the 0 next to each item being placed in the trade. A list of how many of that item should appear. Select the number wished to trade. Then press the Submit located at the bottom of the menu.
9. Move down to the next section provided. It should be labeled as Villagers. Click on the button next to the title stating Modify. A navigation menu should appear listing all the villagers currently owned. The webpage should look like something similar to what is shown below.

10. Click the box on the right side to select which villagers to trade. Then scroll towards the bottom of the menu and press Submit. The webpage should look like something similar to what is shown below.

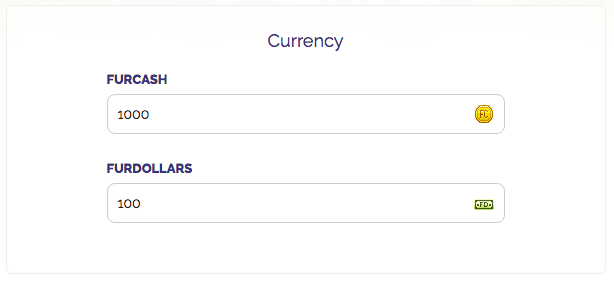
11. Move down to the next section provided. It should be labeled as Currency. Enter in the amount wanting to send in the text box provided. The first text box is for FurCoins and the second text box below that is for Furdollars.
12. Move towards the bottom of the browser and press Send Trade.

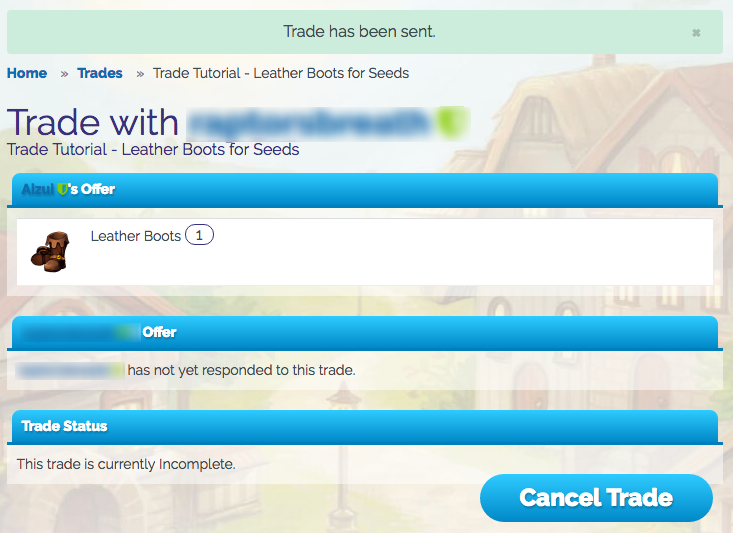
NOTE: A notification will appear stating that the trade was sent and a review of what the trade consisted of.
Section #4 ---- Status of a Trade
NOTE: To access a trade at anytime. Go to the Trade menu and select the Subject of the trade. This will allow for cancelations as well as understanding of which step the trade is in.
Trades are not one-sided. Each member must take part in the process in order to confirm or deny the trade. To better explain this study the following terminology.
Player A starts the trade with Player B
Incomplete - Player A successfully sent a trade to another member of Furvilla. Player B must review the trade in order to move forward in the trade. This stage simply means to wait.
Pending - Player B reviewed the trade and sent it back.
Accepted - Both Player A and Player B agreed to the trade and took the items offered.
Canceled - The trade was deleted by Player A.
Rejected - Player A or Player B disagreed to the trade and did not take the items offered.
Basically Player A sends over the original trade (Incomplete stage.) Then Player B reviews it and adds or subtracts items, villagers or currency (Pending stage.) Once after confirming his or her choice Player B sends it back. (Player B can reject the trade at this stage instead of editing it.) Then Player A reviews it and either Accepts or Rejects it.
NOTE: A notification will appear at the top of the Furvilla browser and will look something like the image below. This will help keep track of what step in the process each member’s in.


