Villager Profiles and CSS
Villager Profiles & CSS
By: Minato
Do you want to fancify your villagers' profiles with colors and images but don't know how? Look no further! This article is here to help.
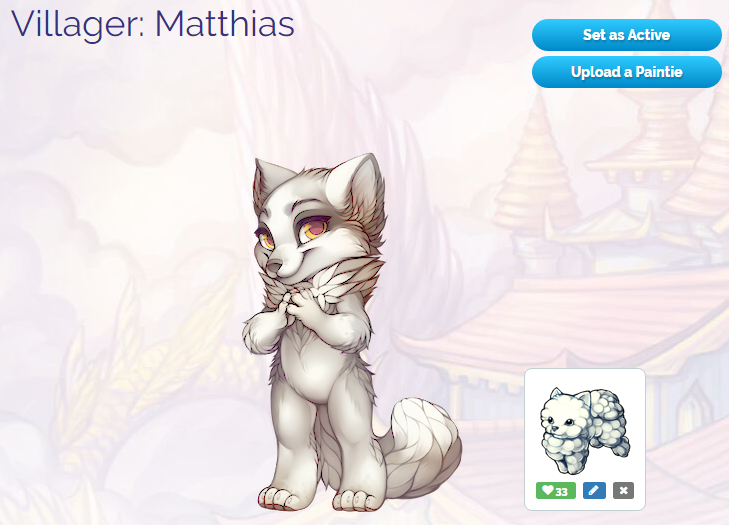
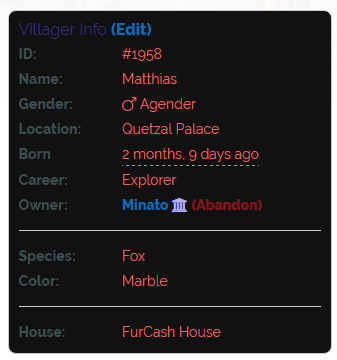
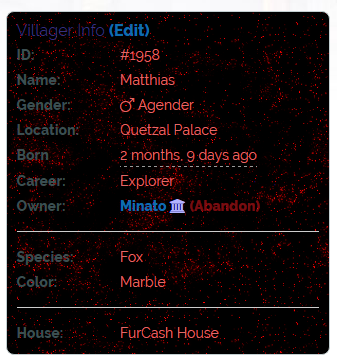
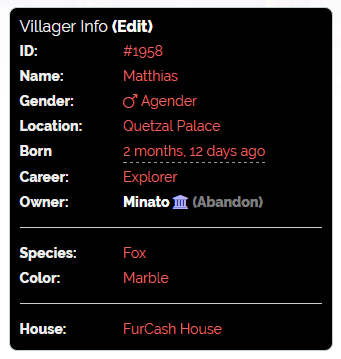
For the purposes of this guide, I will be using my villager Matthias:
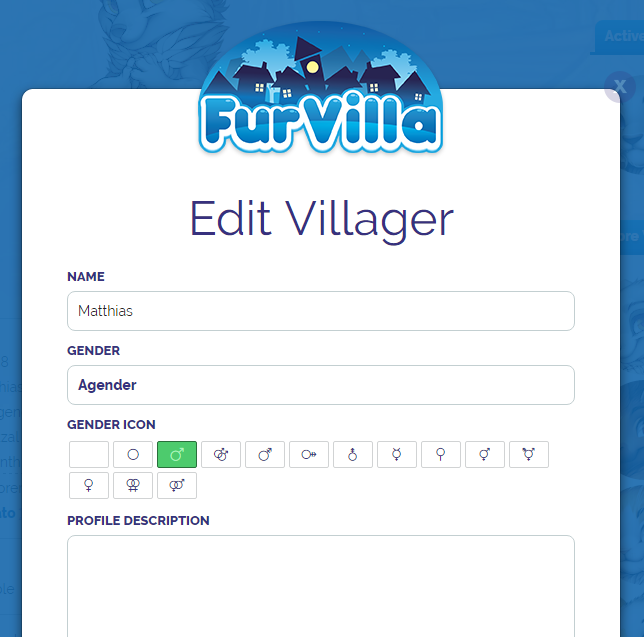
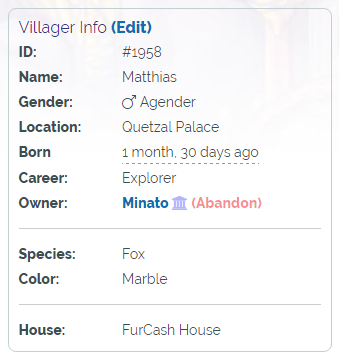
To get started, underneath your villager's image is a box containing your villager's basic information and a button labeled "(Edit)". Click that!
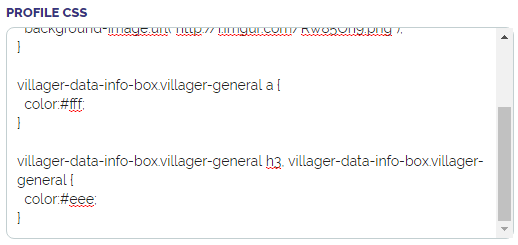
The following menu should then pop up:
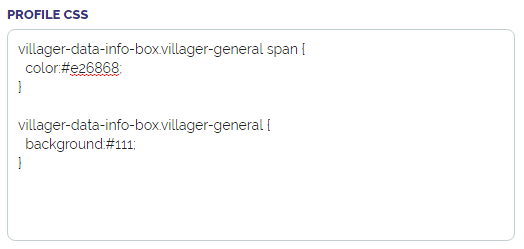
Scroll down a bit and you should see the focus of this guide, the Profile CSS box:

This is where we will be doing our editing!
You can do many things with CSS, including, but not limited to: adding backgrounds, changing the colors, font families and sizes of text and much more! But for now, let's start by trying something simple.
I'm going to be changing the text inside this box--known in the editing world as a div--so that the text color changes from black to a light red. To start with, you must know the name of the div (or "class") so that you can edit it. For future reference, this div's class is titled villager-data-info-box villager-general (yes, including the space). So, let's edit it!
Go back to the Profile CSS box and insert the following:
villager-data-info-box.villager-general span {
color:#e26868;
}
color:#e26868;
}
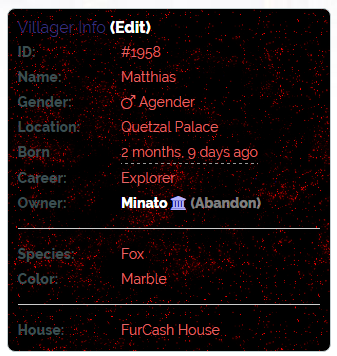
Hit save, and watch the code do its magic!
As you can see, the text is now red. But how exactly did that happen? Here's a breakdown of the code, line by line:
villager-data-info-box.villager-general span {
First, "villager-data-info-box.villager-general" refers to the object you are editing. This is called a selector. CSS doesn't know how to parse spaces in class names, so the full stop is added in its place to indicate that you are indeed editing villager-data-info-box villager-general and not simply villager-data-info-box. "span" is the element of the object you are editing; the information to the right of the bold words are wrapped in <span></span> tags, so you are editing "span". "{" just tells the editor that you are about to enter code to style the element.
color:#e26868;
The spaces at the front are only intended as indentation; it is not required for the editor to parse your code, but is commonplace in the editing environment to keep your code looking organized and tidy. "color:" is the property you are telling the editor to change--in this case, the text color. "#e26868;" is the value to change it to. As you can see, the value is a hex color translating to a light shade of red. The semicolon indicates that this particular line of code is finished and tells the editor to move onto the next one.
}
This is just the closing tag for the "{" you saw earlier. It tells the editor you are done inserting code for the current element.
Beware! There are certain things you are not allowed to do with CSS. You can view details on this here.
Backgrounds and Images
Okay, so the text is a charming shade now! But what about the background? Let's go back to our editor and add a new code block.
Here, I've already filled out the "background:" field. You may notice that I only used 3 numbers instead of 6, as is standard for hex colors. The reason for this is simple: CSS can determine what color you want with only the first number (or letter) of each "part" of the color's hex number. The full hex number in this case would be 111111, divided into three "parts" of 11. Therefor, CSS automatically fills out the remaining slots with "1".
Let's save and see our progress:
So far so good. But what if you wanted to use an image? I'll be using an image I already applied to a different profile, that I made myself:
There's two ways you can go about this. One way is to use the "background:" property from before, and another is to use "background-image:", like so:
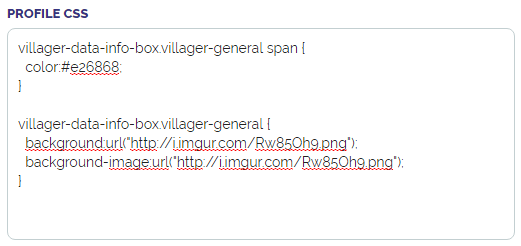
However, you only need one, so feel free to remove one. This is the result:
Please keep in mind, if your image is smaller than the element it's applied to, it will be repeated in order to fill the extra space (similar in concept to a wallpaper). If you don't want that to happen, you would use the following code:
background-repeat:no-repeat;
This will make the image appear only once.
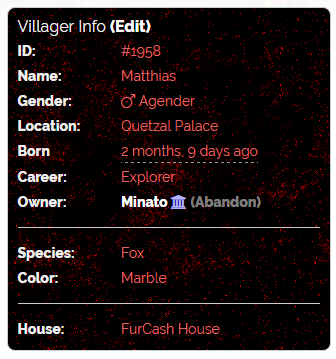
Our profile is looking nice enough, but we have to cover the details! Let's start with the link color.

"a", in the world of HTML, refers to hyperlinks. The color I am using in this case is white.
That looks much better against the dark background!
Now for some other points:
And now we have a nice info box set up!
Transitions
There's another technique with CSS that is also fairly recent: transitions! Transitions are a type of animation creating a transition from one value to another. For simplicity's sake, I will show you how to do something relatively easy: changing the color of a link when you hover over it with your cursor. First let's go back to our villager-data-info-box.villager-general a selector and edit it:
villager-data-info-box.villager-general a {
color:#fff;
transition: all 2s ease;
-webkit-transition: all 2s ease;
-moz-transition: all 2s ease;
-ms-transition: all 2s ease;
-o-transition: all 2s ease;
}
color:#fff;
transition: all 2s ease;
-webkit-transition: all 2s ease;
-moz-transition: all 2s ease;
-ms-transition: all 2s ease;
-o-transition: all 2s ease;
}
Below our link text color, we added a series of codes. The first line, transition: all 2s ease;, is our bread and butter, so to speak--it's what tells the editor we want something to transition. The others are there in order to make the transition compatible across other browsers. Without them, your code is not guaranteed to work as expected.
Transitions are made up of three values: the property you want to transition, the duration you want the transition to last, and the type of transition. In this case we have "all", "2 seconds" (2s) and "ease" respectively (other transition types you can try in place of "ease": linear, ease-in, ease-out, ease-in-out).
Next, let's add a new selector:
villager-data-info-box.villager-general a:hover {
color:#e26868;
}
color:#e26868;
}
The result is a little difficult to explain with just a screenshot, so I suggest saving and hovering your mouse over a link to see the effect!
You can apply transitions to things other than just text, as well. Let's try changing the entire div:
villager-data-info-box.villager-general {
background-color:#000;
transition: all 2s ease;
-webkit-transition: all 2s ease;
-moz-transition: all 2s ease;
-ms-transition: all 2s ease;
-o-transition: all 2s ease;
}
villager-data-info-box.villager-general:hover {
background-color:#111;
}
background-color:#000;
transition: all 2s ease;
-webkit-transition: all 2s ease;
-moz-transition: all 2s ease;
-ms-transition: all 2s ease;
-o-transition: all 2s ease;
}
villager-data-info-box.villager-general:hover {
background-color:#111;
}
Now the entire info box will change color when you hover over it!
Before hovering:
After:

You can also change other properties such as height, width, and so on. Experiment!
Conclusion
There are many, many other things you can do with CSS! Unfortunately, many of them are beyond the scope of this tutorial as it would take a very long time to detail every possibility. However, if you are interested in learning more advanced techniques and styling options, I highly recommend W3Schools. This is where I learned CSS myself many years ago, and it is still a great resource today! Good luck on your coding endeavors!

